Windows10で公開鍵認証の鍵ペアを生成
Windows10にて公開鍵認証の鍵ペアを生成し、GitHubに公開鍵を登録する手順をまとめます。
設定する内容
- 公開鍵認証のデジタル署名アルゴリズムは「ed25519」を利用
- 秘密鍵にはパスフレーズを設定しない (任意)
- パスワード認証方式を無効化(公開鍵認証以外は全て無効にする。)
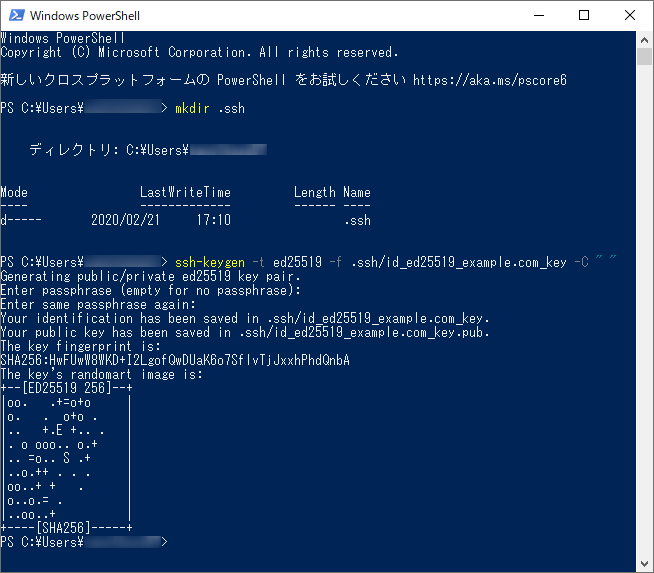
Windows10で公開鍵認証の鍵ペアを生成
ssh-keygen -t ed25519 -f .ssh/id_ed25519_github.com_key -C " "
パスフレーズを聞いてきますのでパスフレーズなしでエンターを押下します。(2回)
Enter passphrase (empty for no passphrase):
Enter same passphrase again:
Gitの設定
git 全体のユーザー名・メールアドレスの設定です
git config --global user.name "GitHubのユーザー名"
git config --global user.email "GitHubのメールアドレス"
確認方法
git config --global --list
user.email="GitHubのメールアドレス"
user.name="GitHubのユーザー名"
 GitHubのユーザ名は、GitHubで確認する。
Gitに秘密鍵を指定する
~/.ssh/configを作成
Host github.com
    IdentityFile ~/.ssh/id_ed25519_github.com_key #ここに作成した秘密鍵を指定する
    TCPKeepAlive yes
    IdentitiesOnly yes
    User git
公開鍵の登録
- GiHubにログイン
- GitHubのRepositoriesを選択する
- [Settings]-[Deploy keys]をクリックする。[Add Deploy key]をクリックする
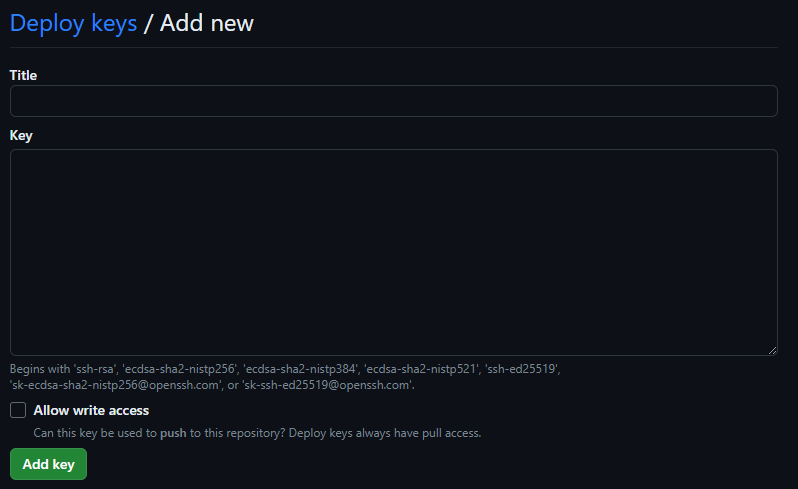 “Allow write access"にチェックを必ず入れる
確認方法
Powershellを起動して下記コマンドを実行する。
ssh -T git@github.com
“You’ve successfully authenticated” と表示されることを確認する。
Hi ancient-blog/hugo.github.io! You've successfully authenticated, but GitHub does not provide shell access.